| STM32F407移植LVGL基于RT | 您所在的位置:网站首页 › rtthread studio下载算法 › STM32F407移植LVGL基于RT |
STM32F407移植LVGL基于RT
|
文章目录
一、无操作系统1.源码获取:2.输出设备配置(屏幕配置)几个关键函数屏幕初始化函数:显示刷新(画点)函数
3.输入配置(触摸)4.提供时基
二、RT-Thread1.新建工程2.添加软件包,屏幕相关文件以及添加编译路径3.输出设备配置(屏幕配置)4.输入设备配置(Touch设备配置)
LVGL移植
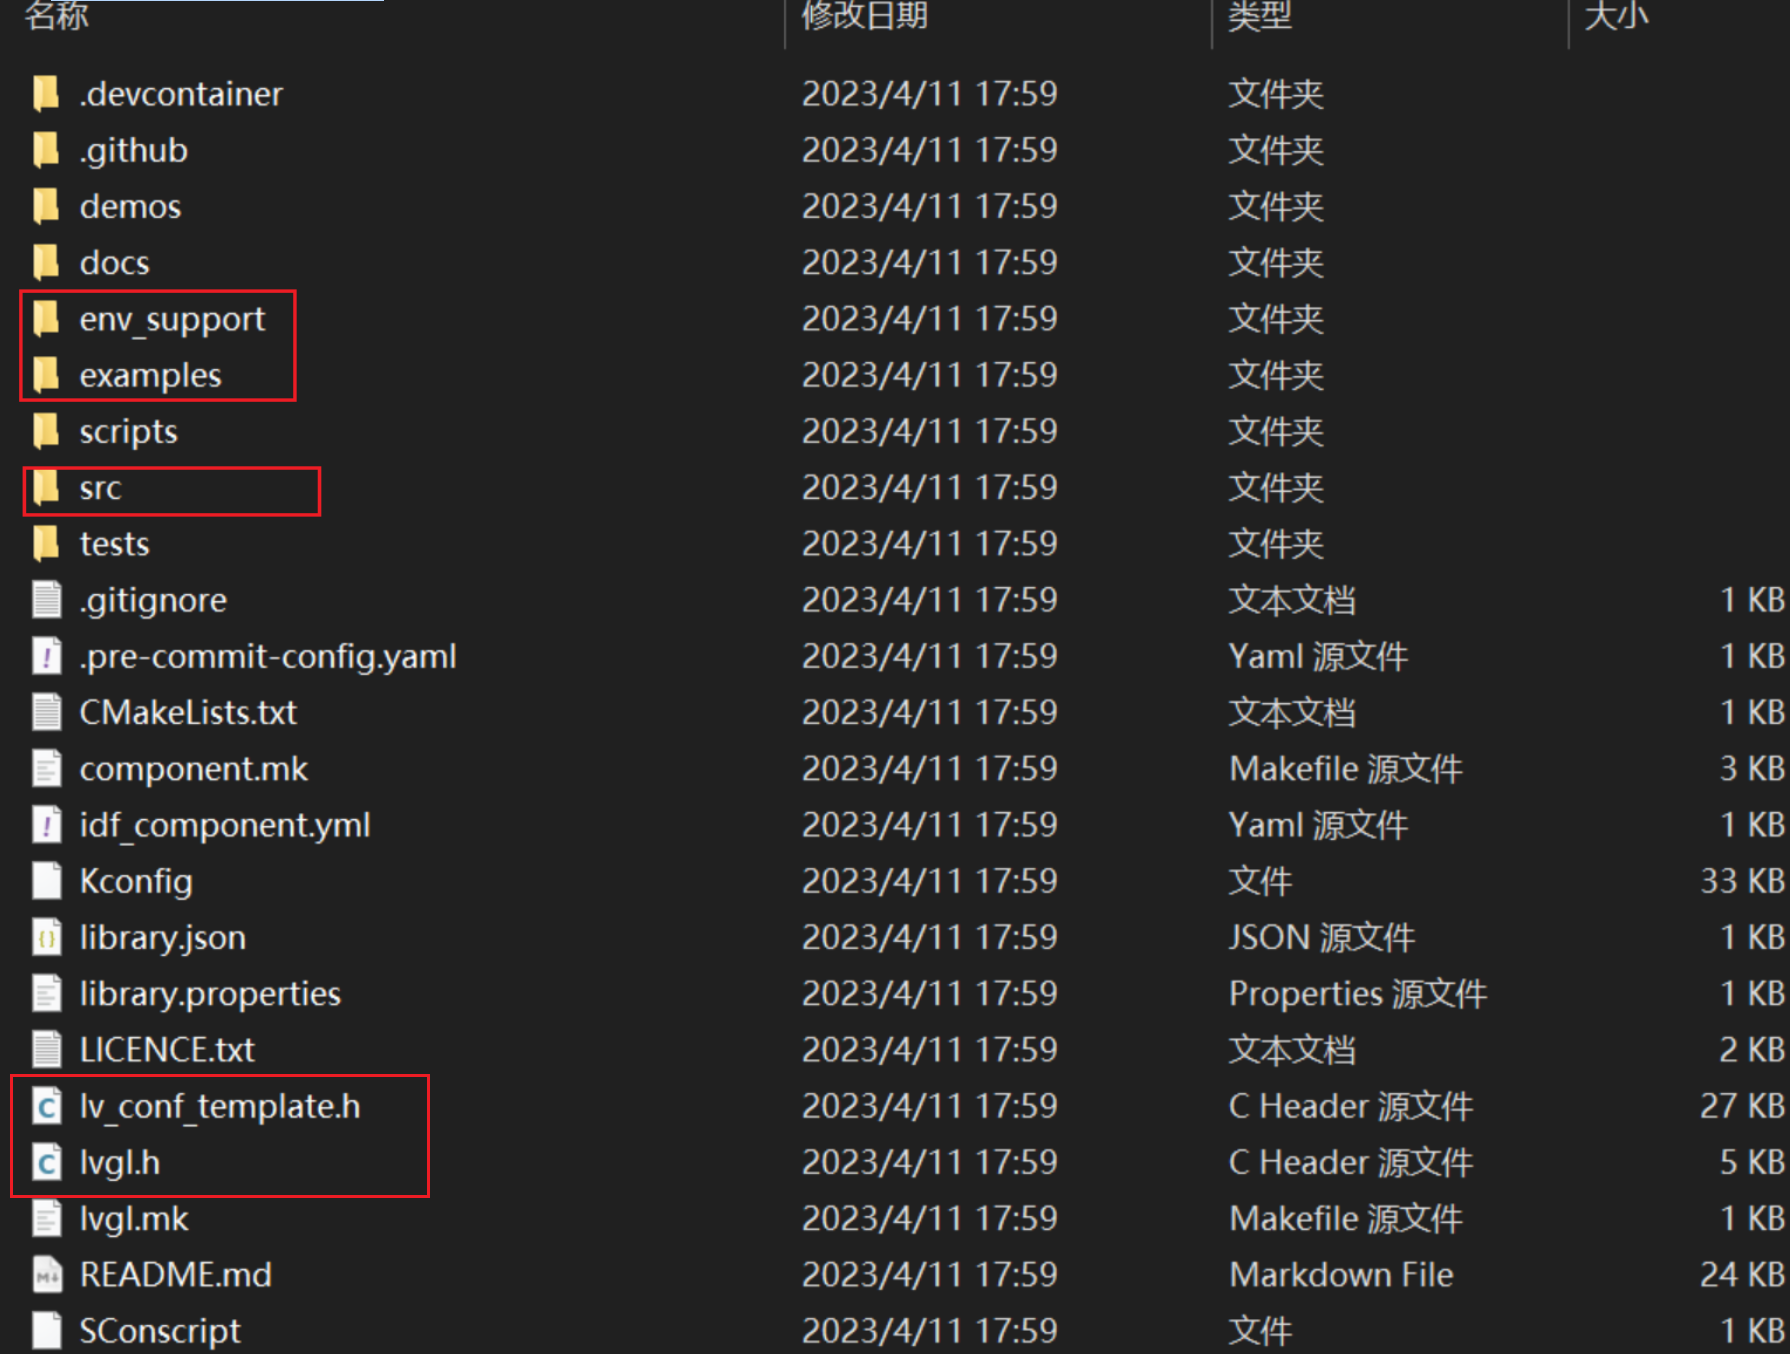
前言:本次LVGL移植分为有操作系统和无操作系统两种方式。操作系统使用的是RT-Thread 硬件使用野火STM32F407霸天虎开发板,屏幕使用nt35510显示IC,触摸使用gt917s芯片 一、无操作系统开发环境使用wsl环境下的VScode+arm-none-eabi-gcc编译+openocd烧录+arm-none-eabi-gdb调试,具体可以参考https://blog.csdn.net/weixin_51954217/article/details/129350873?spm=1001.2014.3001.5501 1.源码获取:LVGL核心图形库github地址:https://github.com/lvgl/lvgl 解压后目录如下:红框圈起来的文件是必须的文件,其他的可删可不删
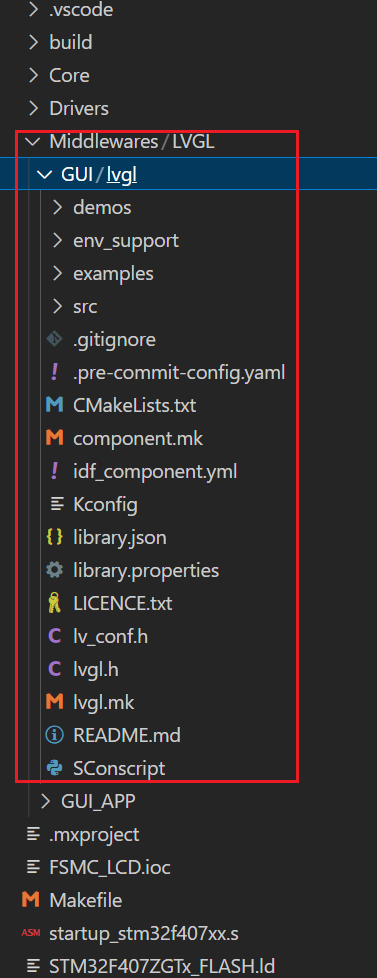
将文件夹复制到工程目录下
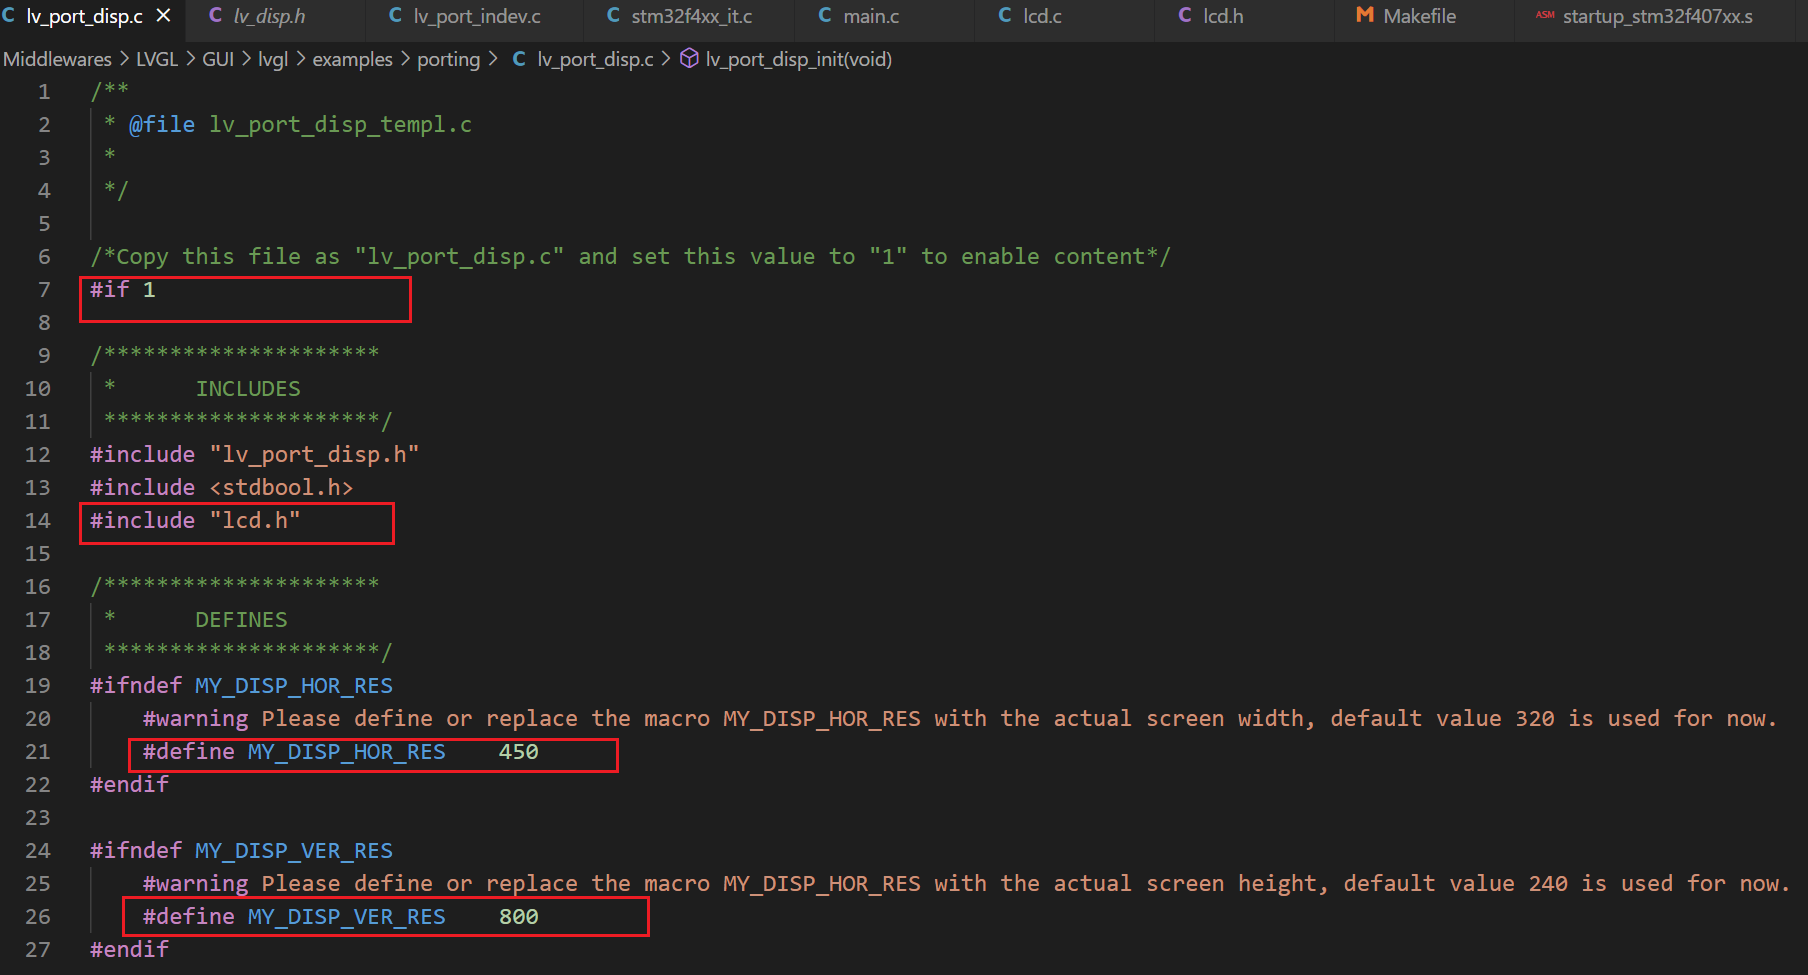
我们主要修改lvgl/examples/porting文件夹下的lv_port_disp_templete.c/.h文件和lv_port_indev_templete.c/.h文件以及lvgl文件夹下的lv_conf_templete.h文件 这几个文件的作用如下: lv_port_disp_templete.c/.h:输出设备接口文件,在这里使用的是LCD屏幕,将屏幕的初始化函数以及画点函数对接起来,使LVGL库能够画图。lv_port_indev_templete.c/.h:输入设备接口文件,在这里使用的是touch电容触摸,将触摸反馈与LVGL的接口对接,使LVGL能够对触摸做出反应。 2.输出设备配置(屏幕配置)将lv_port_disp_templete.c/.h文件分别重命名为lv_port_disp.c/.h 将这两个文件里的条件编译#if 0改为#if 1表示启用这两个文件 lv_port_disp_templete.h改名为lv_port_disp.h后记得包含的头文件也改成lv_port_disp.h。 包含自己的显示屏头文件lcd.h 修改显示屏的水平宽度和垂直宽度为实际屏幕的尺寸,我的水平方向450,垂直方向800
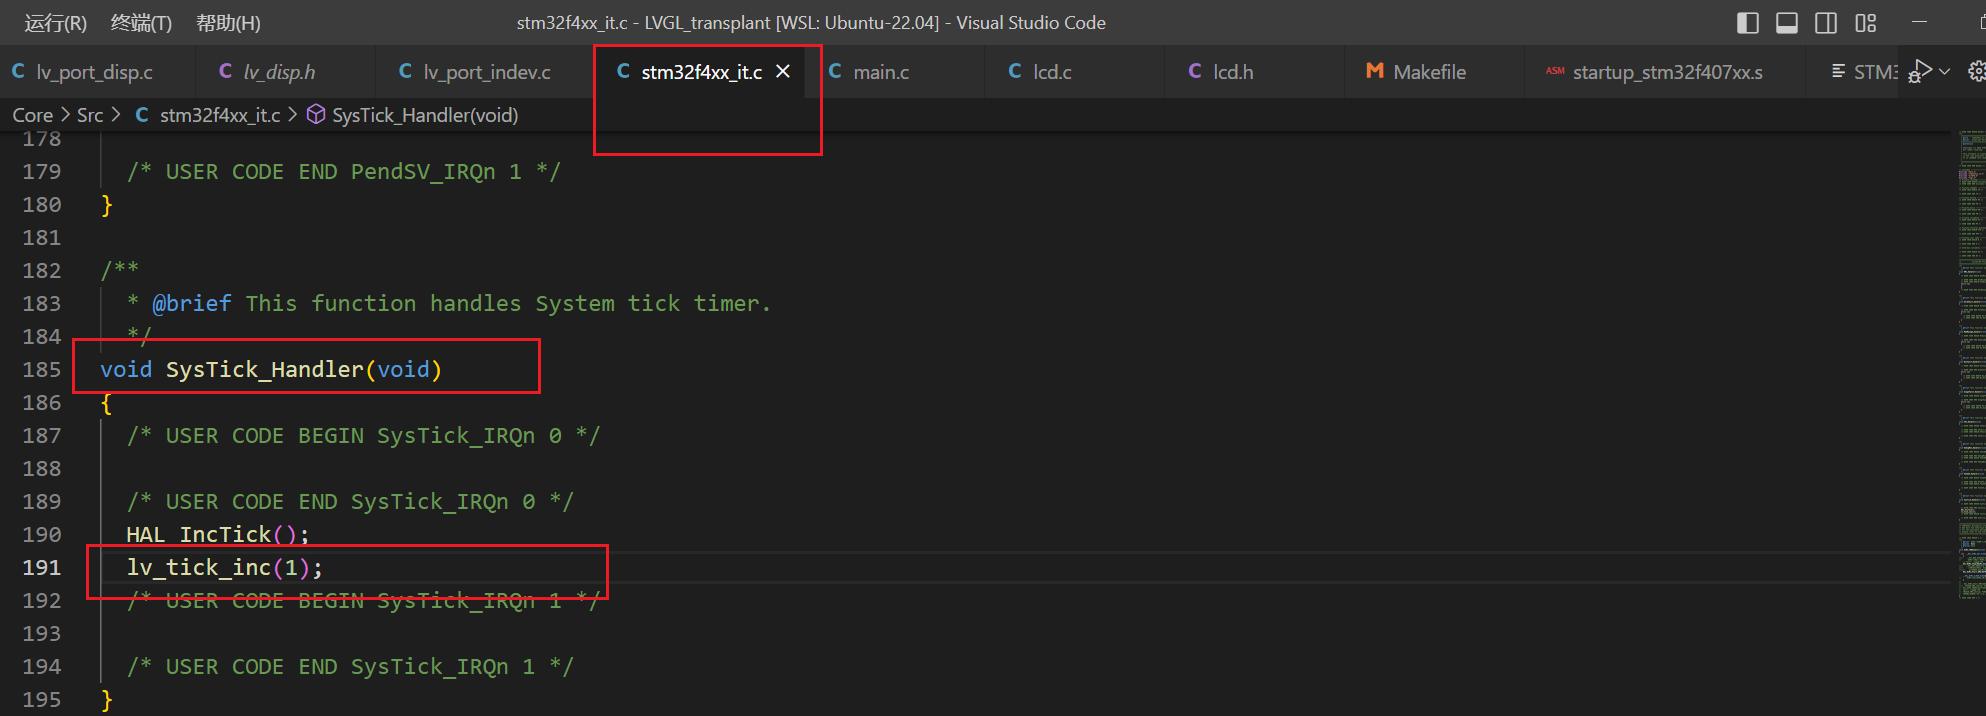
void lv_port_disp_init(void)//通过调用该函数初始化屏幕 static void disp_init(void)//将屏幕的初始化代码放在里面 static void disp_flush(lv_disp_t * disp_drv, const lv_area_t * area, lv_color_t * px_map)//我们需要补全显示刷新(画点)函数 屏幕初始化函数:我的屏幕初始化函数为LCD_Init(),在lcd.h中,作用是初始化屏幕相关的IO口和屏幕驱动方式FSMC的初始化,以及屏幕初始化参数的写入等。 static void disp_init(void) { /*You code here*/ LCD_Init(); } 显示刷新(画点)函数其中LCD_SetPointPixel函数用于将屏幕x , y点设置为十六位的color这个颜色 static void disp_flush(lv_disp_t * disp_drv, const lv_area_t * area, lv_color_t * px_map) { if(disp_flush_enabled) { /*The most simple case (but also the slowest) to put all pixels to the screen one-by-one*/ int32_t x; int32_t y; for(y = area->y1; y y2; y++) { for(x = area->x1; x x2; x++) { /*Put a pixel to the display. For example:*/ /*put_px(x, y, *px_map)*/ /* 下面自己的代码 */ uint16_t color=0; color |= px_map->red /*Your code comes here*/ GTP_Init_Panel(); } /*Will be called by the library to read the touchpad*/ static void touchpad_read(lv_indev_t * indev_drv, lv_indev_data_t * data) { static lv_coord_t last_x = 0; static lv_coord_t last_y = 0; /*Save the pressed coordinates and the state*/ if(touchpad_is_pressed()) { touchpad_get_xy(&last_x, &last_y); data->state = LV_INDEV_STATE_PR; } else { data->state = LV_INDEV_STATE_REL; } /*Set the last pressed coordinates*/ data->point.x = last_x; data->point.y = last_y; } /*Return true is the touchpad is pressed*/ static bool touchpad_is_pressed(void) { /*Your code comes here*/ //实现touchpad_is_pressed函数 if(GTP_Scan(0)) { return true; } return false; } /*Get the x and y coordinates if the touchpad is pressed*/ static void touchpad_get_xy(lv_coord_t * x, lv_coord_t * y) { /*Your code comes here*/ (*x) = tp_dev.x[0]; (*y) = tp_dev.y[0]; } #else /*Enable this file at the top*/ /*This dummy typedef exists purely to silence -Wpedantic.*/ typedef int keep_pedantic_happy; #endif关键函数 static void touchpad_init(void) 将自己的touch初始化函数放在里面static bool touchpad_is_pressed(void) 补全该函数,使touch设备按下时返回truestatic void touchpad_get_xy(lv_coord_t * x, lv_coord_t * y) 补全该函数使其能够返回touch坐标的函数函数实现: static void touchpad_init(void) static void touchpad_init(void) { /*Your code comes here*/ GTP_Init_Panel(); }将自己的touch.h中的touch初始化函数放在里面 static bool touchpad_is_pressed(void) static bool touchpad_is_pressed(void) { /*Your code comes here*/ //实现touchpad_is_pressed函数 if(GTP_Scan(0)) { return true; } return false; }实现一个touch扫描函数,当电容屏被触摸时返回真值 static void touchpad_get_xy(lv_coord_t * x, lv_coord_t * y) static void touchpad_get_xy(lv_coord_t * x, lv_coord_t * y) { /*Your code comes here*/ (*x) = tp_dev.x[0]; (*y) = tp_dev.y[0]; }将touch设备获取的坐标返回给x,y 4.提供时基与操作系统类似,LVGL也需要时基,相当于LVGL的心跳,API为LV_ATTRIBUTE_TICK_INC void lv_tick_inc(uint32_t tick_period) 需要将其放在定时器中断函数里,多少毫秒产生一次中断就在参数里填写几。这里将其放在SysTick系统滴答定时器的中断函数里,就不需要为其开一个单独的定时器了
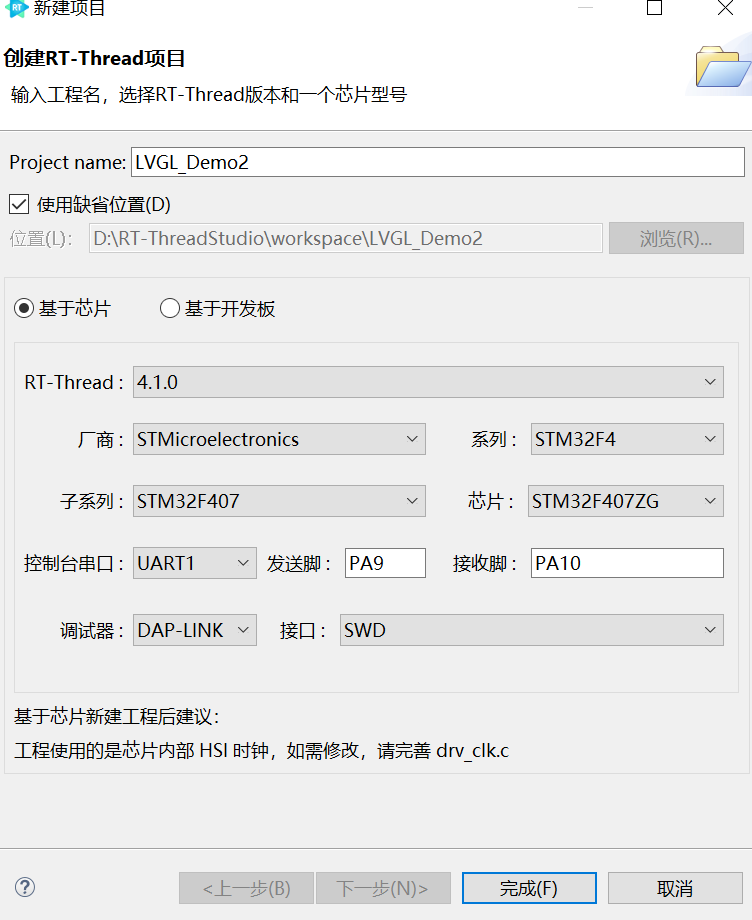
开发环境使用RT-Thread Studio 参考RT-Thread官方LVGL移植步骤https://www.rt-thread.org/document/site/#/rt-thread-version/rt-thread-standard/packages-manual/lvgl-docs/indev-touch-port 1.新建工程首先基于芯片新建一个RT-Thread标准版工程
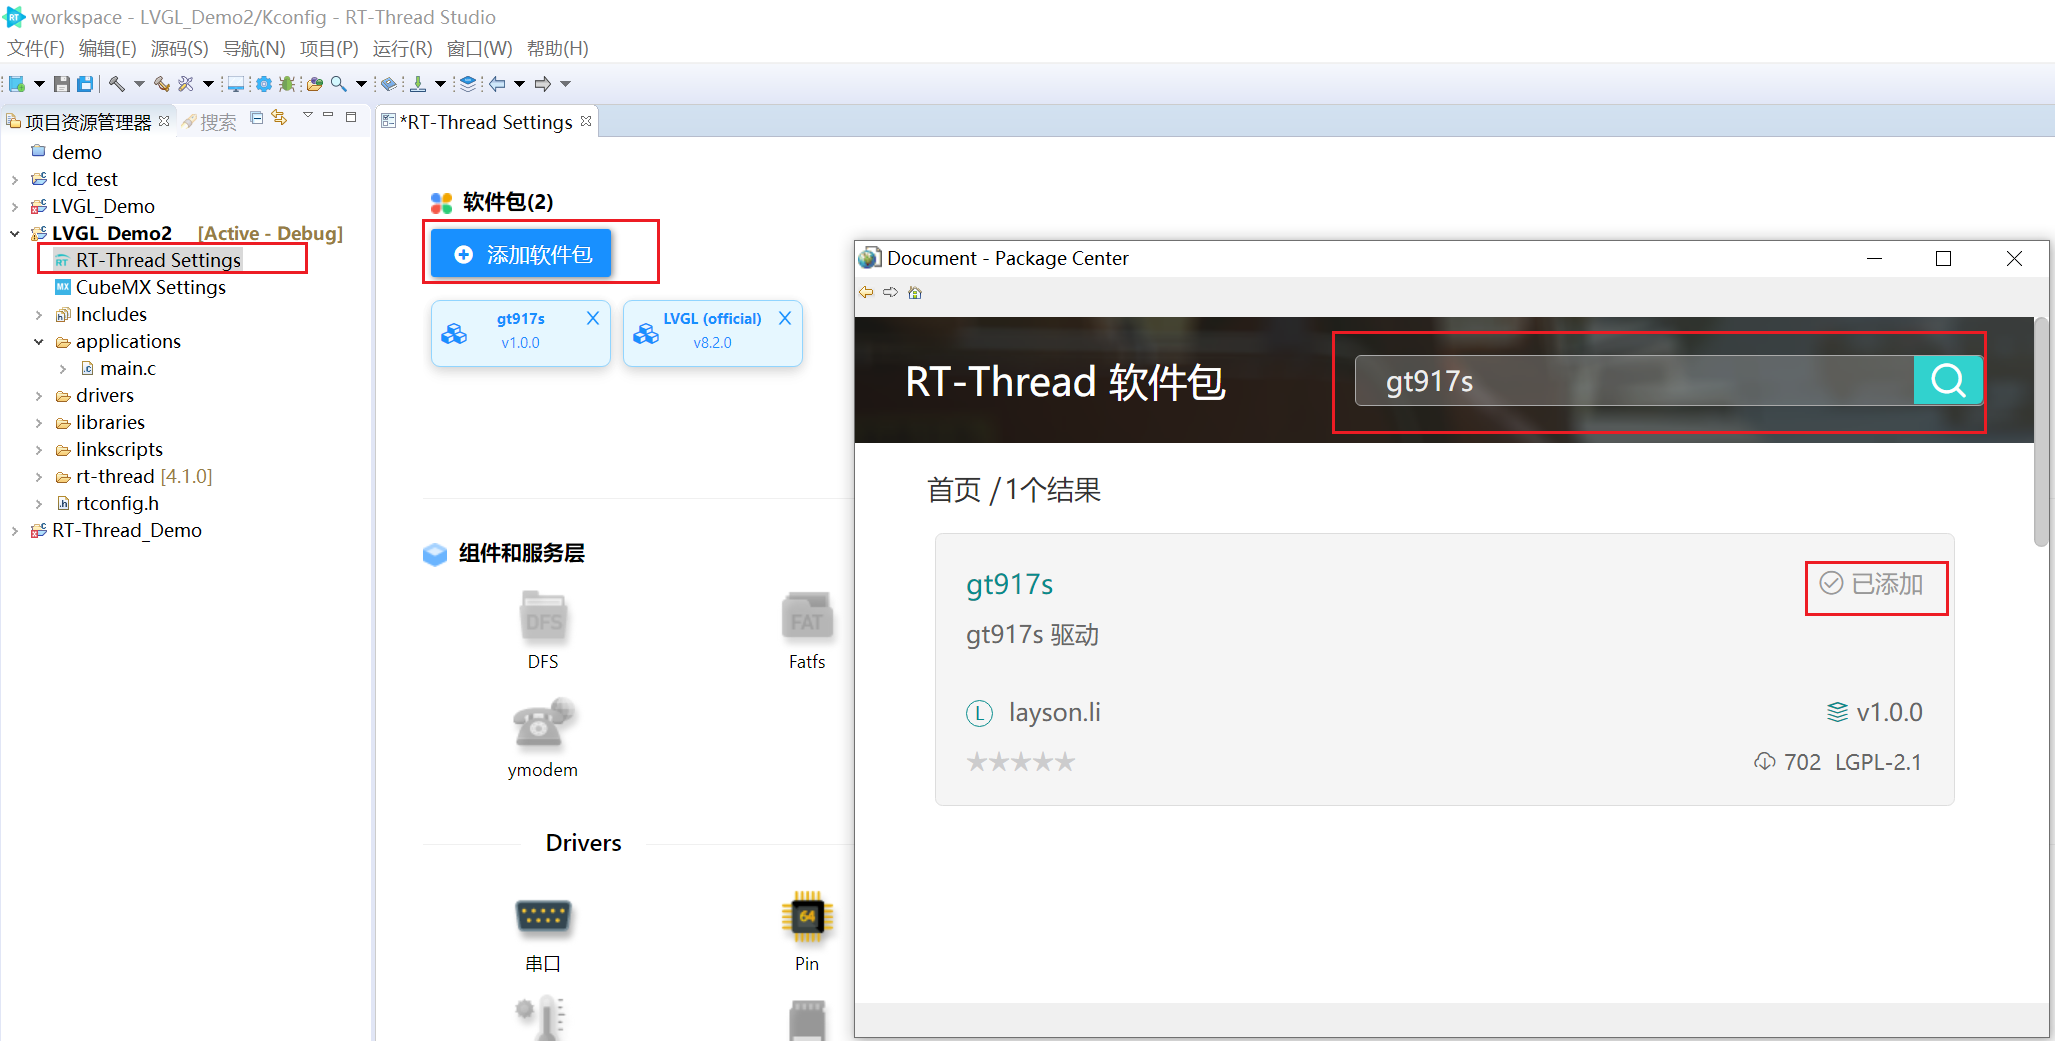
添加LVGL软件包与触摸芯片软件包
ctrl+s保存后等待软件包应用到工程中,应用完成后可以在packages目录下看到新导入的lvgl与触摸ic软件包
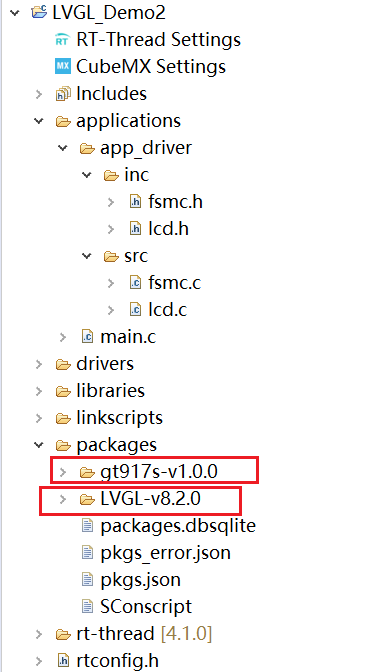
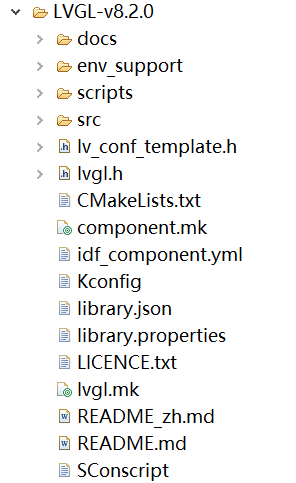
可以看到LVGL软件包中没有lv_port_disp_templete.c/.h和lv_port_indev_templete.c/.h文件,需要从文件目录中复制过来
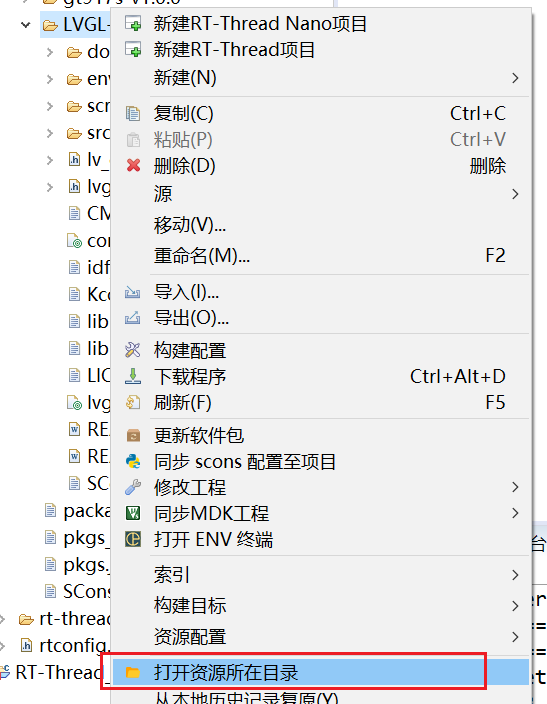
右键LVGL目录->打开资源所在目录,将examples->porting文件夹下的lv_port_disp_templete.c/.h和lv_port_indev_templete.c/.h文件复制到applications目录下
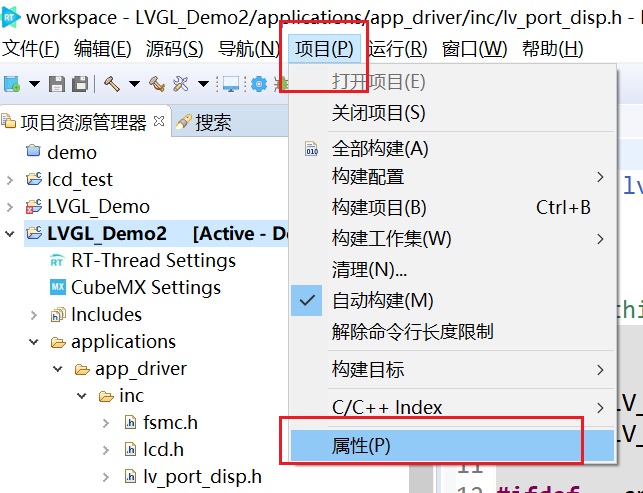
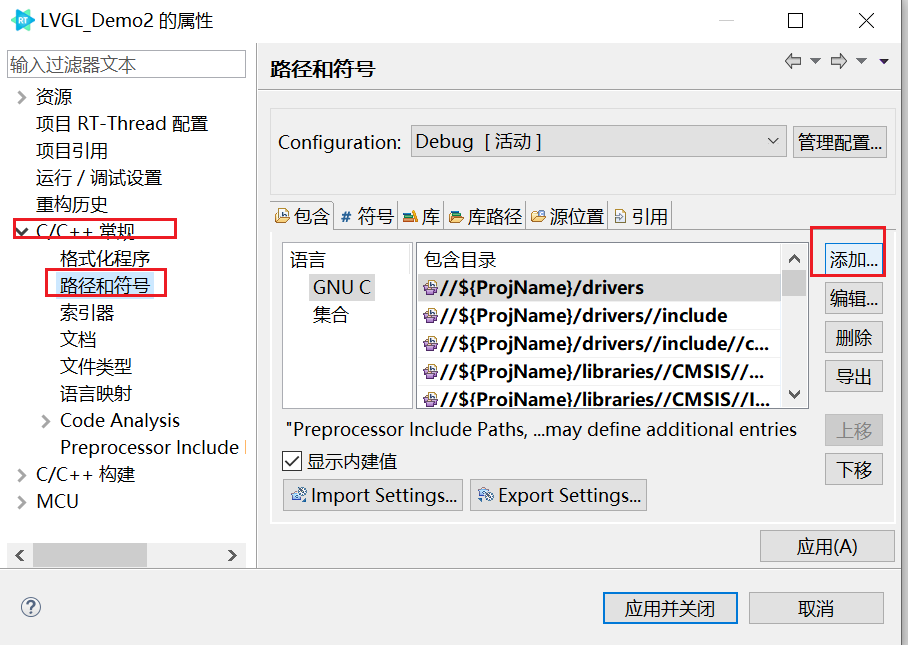
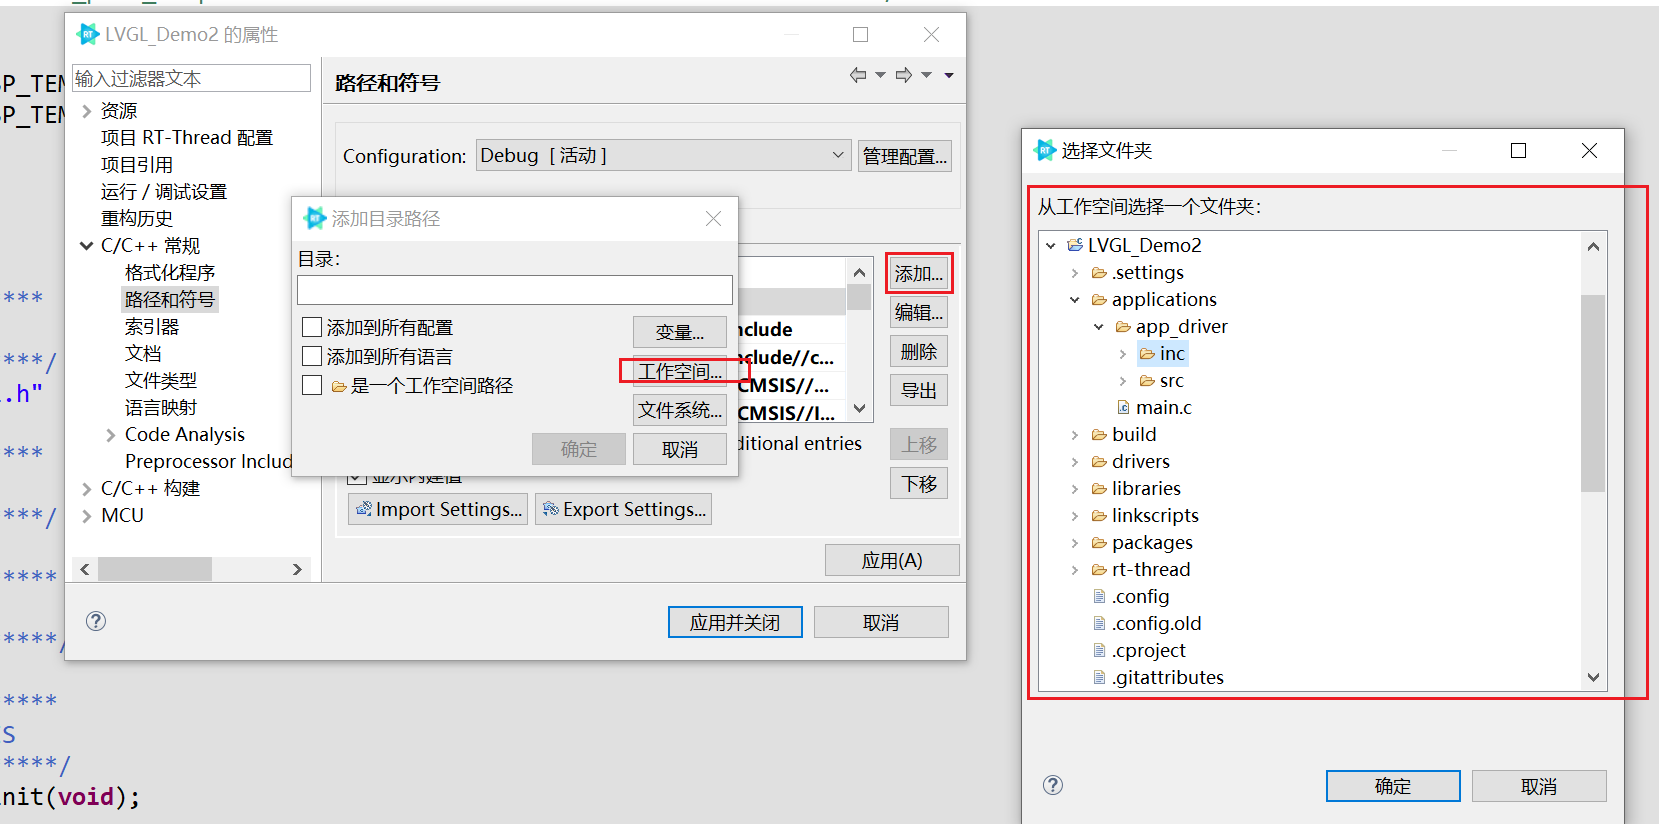
将自己的屏幕相关代码拷贝到工程的applications目录下,我在applications目录下新建了app_driver文件夹,在该文件夹下又新建了inc与src文件夹分贝存放头文件与源文件。将刚才复制的lv_port_disp_templete.c/.h和lv_port_indev_templete.c/.h文件也分别改名后放到inc与src目录下。 注意:因为我们直接复制的文件到工程中,所以编译器中没有保存我们复制的文件的路径,编译的时候会存在找不到文件的情况,需要将路径添加到工程路径中 方法:
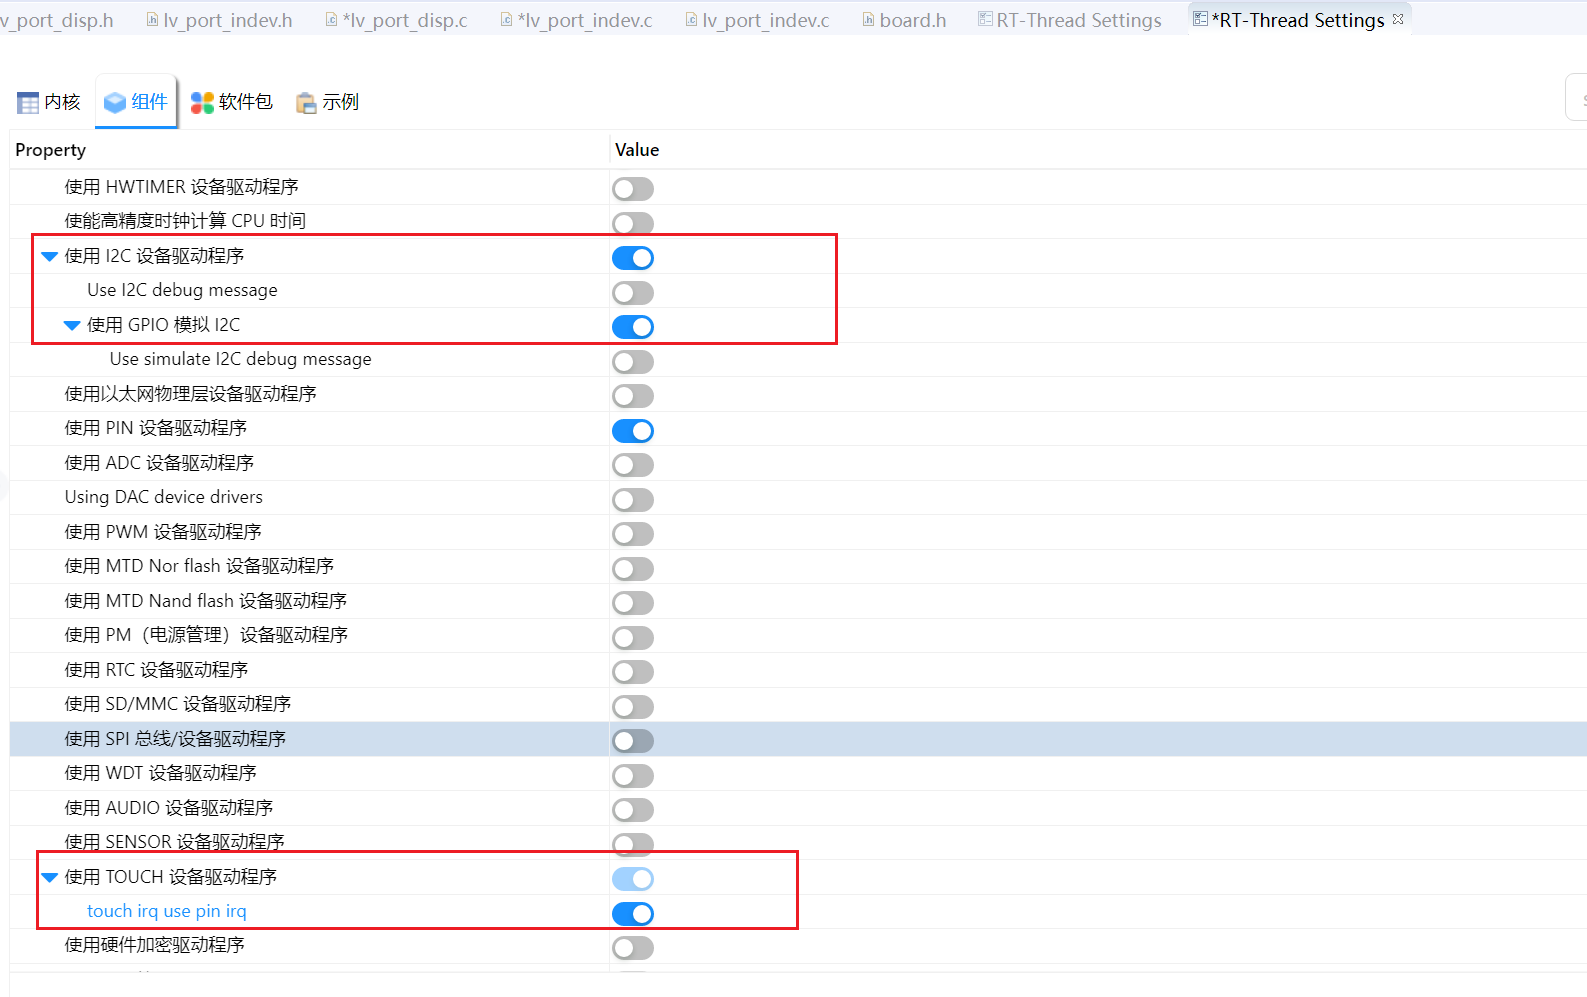
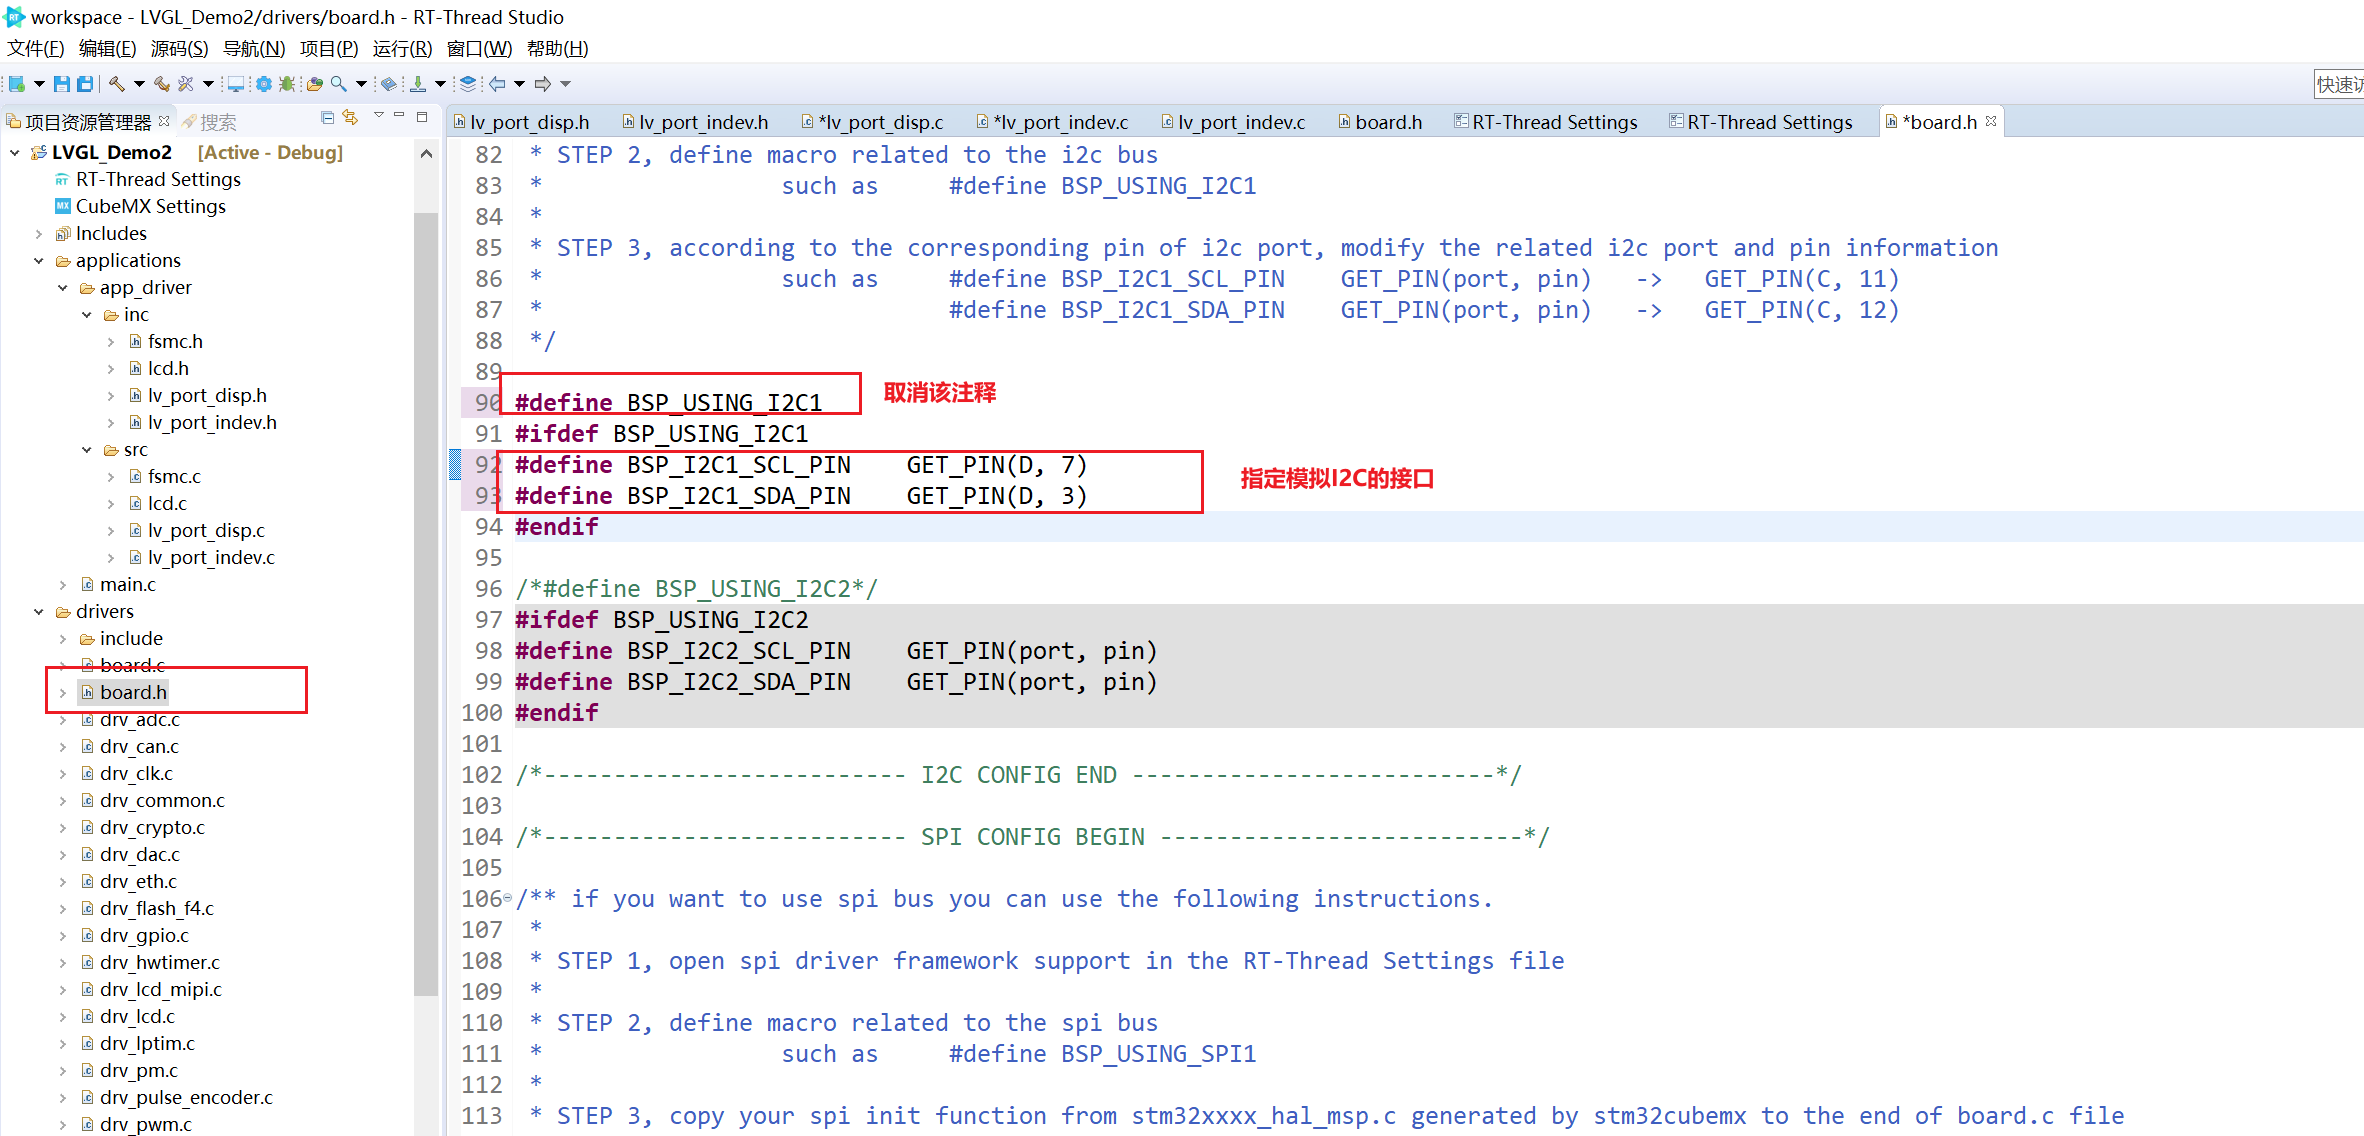
添加完成后应用即可 3.输出设备配置(屏幕配置)将lv_port_disp_templete.c/.h文件分别重命名为lv_port_disp.c/.h 将这两个文件里的条件编译#if 0改为#if 1表示启用这两个文件 lv_port_disp_templete.h改名为lv_port_disp.h后记得包含的头文件也改成lv_port_disp.h。 包含自己的显示屏头文件lcd.h 修改显示屏的水平宽度和垂直宽度为实际屏幕的尺寸,我的水平方向450,垂直方向800 步骤与无操作系统的一样,步骤吧参考无操作系统的,因为屏幕没有接入rtthread的设备框架,后期有时间会接入设备框架。 4.输入设备配置(Touch设备配置)touch设备接入参考rtthread官方文档进行的修改,因为gt917s这个软件包对接了rtthread的touch设备框架,所以在这里我们需要使用rtthread的touch设备框架的api lvgl中原先需要我们实现的touchpad_init(); static void touchpad_get_xy(lv_coord_t * x, lv_coord_t * y)都用不到被我注释掉了。参考官方教程后我移植的程序如下,实测是可以运行的。注意LVGL版本是8.2.0。 注意:需要在rtthread设置中打开i2c1并使能touch设备的中断(如下图所示),在board.h中取消掉i2c1的注释,并且指定i2c的接口为touch芯片所用到的i2c接口
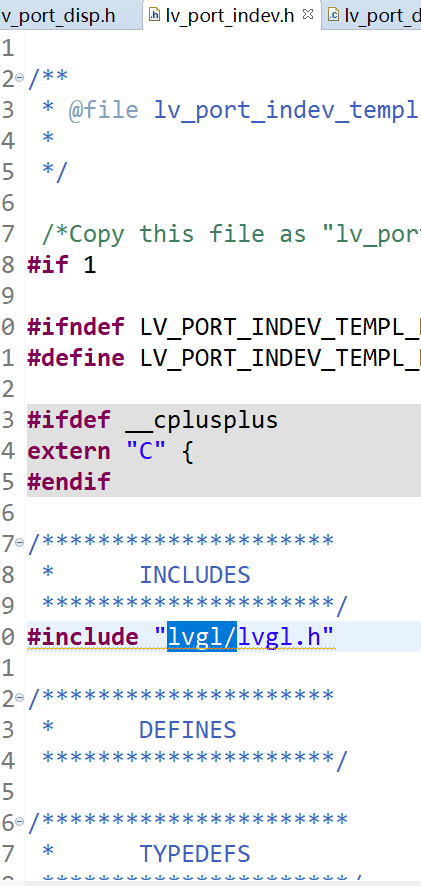
注意在gt917s.c中有int8_t和int16_t两种类型会报错,需要改为rt_uint8_t 和 rt_uint16_t #include "lvgl/lvgl.h"需要改为#include “lvgl.h”
除此之外肯定还有许多没有涉及到的小错误,需要自己根据报错修改。最后展示一下效果
|

【本文地址】